Expert’s Note
Are you planning a wedding, a romantic anniversary, or a beautiful party? You probably asked a professional decorator how much a large heart arch costs. Did you faint when they told you the price? Professional event planners charge hundreds or even thousands of dollars for a single arch! But here is a massive industry secret: building one yourself is incredibly easy.
Whether you want a luxury artificial flower arch or a fun, colorful balloon arch, you can do it at home in just one afternoon. In this simple guide, we will give you the exact step-by-step instructions. Get ready to save your money and amaze all your guests!
Before You Start: Protect Your Floor
Before you bring heavy metal poles, hot glue, or hundreds of balloons into your living room, you must protect your floor. Do not scratch your expensive wood or tiles! We highly recommend putting down a large, soft, and waterproof floor cover. If you don’t know what to use, read our guide on What is PEVA Material. A PEVA sheet is the perfect, safe drop-cloth to keep your floors safe while you build your masterpiece.

DIY Heart Arch Setup: Step-by-Step Guide for Stunning Artificial Flower Install
If you want an expensive, romantic look, artificial flowers are the best choice. Here is how to put the metal frame together and add the beautiful florals.
Step-by-Step Installation Guide (The Frame)
When you buy a metal heart arch kit online, it comes in many small pieces. Do not panic! Follow these simple steps:
Organize the Frame
First, open your box and take out all the metal poles. Put all the straight poles in one pile. Put all the curved pieces in another pile. Find your bag of screws and keep it safe in a small bowl.
Assemble the Base
The base is the most important part. It stops the arch from falling over. Take the two heavy flat feet and attach the straight bottom poles to them. Make sure the screws are very tight!

Install the Side Frames
Now, take the slightly curved poles. Slide them into the bottom base pieces. You will start to see the bottom half of the heart shape forming.
Attach the Top Frame
Take the pieces that curve sharply downwards (these make the top center of the heart). Carefully connect them to the top of your side poles.
Connect the Side Frames Together
Finally, push the top two points together until they click. Tighten every single screw on the entire frame. Shake it gently to make sure it is strong and stable.

Preparing and Attaching the Decor
Now that your metal frame is standing, it is time to make it beautiful!
Prepare the Flowers
Take your artificial flowers out of their boxes. Fluff the petals so they look full and real. Cut some green zip ties. You will use these zip ties to attach the flowers to the metal poles securely.
Attach the Flowers
Start from the bottom left corner. Hold a bunch of flowers against the metal pole and wrap a zip tie tightly around it. Keep adding flowers, moving all the way up one side, and then down the other. Make sure you cover the metal completely!

Inspect the Arch
Step back and look at your arch from 10 feet away. Do you see any empty spots or shiny metal showing? If you do, tuck extra loose flowers or green leaves into those empty holes.
Arrange the Flower Runners
To make the setup look like a million dollars, let some flowers drape down to the floor. This creates a “flower runner.” (Designer Tip: If you have a welcome table next to your arch, lay down a beautiful fabric runner there, too! Use our easy Table Runner Size Guide to get the perfect dimensions).

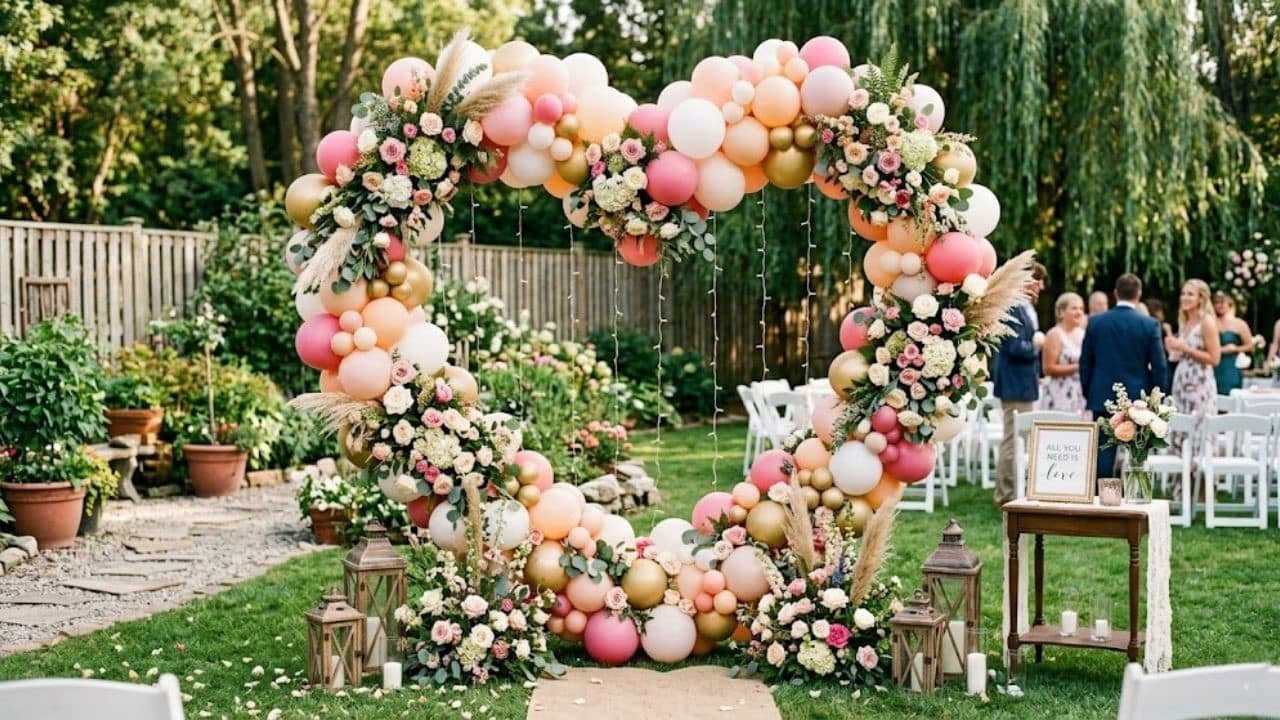
How To Create A Breathtaking Heart-Shaped Balloon Arch
If you want a fun, playful, and budget-friendly option for birthdays or bridal showers, balloons are perfect!
Featured Products You Will Need:
- An electric balloon pump (Do not blow them up with your mouth!)
- A plastic balloon decorating strip tape
- Glue dots
- 100-150 latex balloons in your favorite colors
Step 1: Set the Stage with a Gorgeous Backdrop
A balloon arch looks best when it has a solid color behind it. You can hang a smooth polyester curtain behind your metal heart frame. Just make sure the fabric is not wrinkled! If it looks messy out of the package, learn How to Safely Iron Polyester so your party photos look perfectly professional.

Step 2: Pump Up the Party with Balloons
Plug in your electric balloon pump. Blow up balloons in different sizes—some very big, some medium, and some very small. Tying balloons can hurt your fingers, so ask a friend to help you!

Step 3: Create a Captivating Balloon Garland
Take your plastic balloon strip. Push the tied ends of the big and medium balloons into the holes on the strip. Once the strip is full, use zip-ties to attach the entire heavy strip directly onto your metal heart frame. Finally, use your sticky glue dots to stick the tiny balloons into any gaps. This gives it a professional 3D effect!
The Final Luxury Touch
Your heart arch is complete! But how do you make the entire room look like a magical fairy tale? You add warm lighting.
Place two beautiful, tall candle stands on the floor at the bottom of your arch. The glowing light will make the flowers or balloons look incredible in evening photos. If you don’t know which style to buy, check out our Ultimate Candelabras Decor Guide to pick the perfect modern or crystal pieces!

Conclusion
You do not need to pay a professional thousands of dollars to have a breathtaking party. By following these easy 5th-grade steps, you can build a stunning heart arch all by yourself. Whether you choose romantic artificial flowers attached with zip ties, or a fun, captivating balloon garland, your event will look spectacular. Gather your supplies, protect your floors, and start building your beautiful memories today!