
Editor’s Note
At decoryourroom.com, we frequently emphasize the importance of bringing natural elements indoors. While maintaining a lush collection of tropical houseplants is wonderful, creating your own botanical wall art offers a unique, customized aesthetic that store-bought prints simply cannot match. When you press and frame flowers, you are not just making a decorative item; you are capturing a fleeting moment of nature and preserving it under glass. Whether you want to memorialize a wedding bouquet, showcase foliage from your own garden, or craft a minimalist masterpiece for your walls, this comprehensive masterclass will teach you the exact, step-by-step techniques required to dry, arrange, and display organic specimens like a professional artisan.
Introduction: The Resurgence of Pressed Botanical Art
For centuries, botanists and nature enthusiasts have flattened and dried plant specimens for scientific documentation. Today, this historic preservation method has experienced a massive resurgence in the world of interior design.
Homeowners are increasingly moving away from mass-produced canvas prints, seeking out authentic, handcrafted decor that tells a personal story. Flattened blooms displayed in sleek, transparent glass provide a delicate, organic texture that softens harsh architectural lines.
The beauty of this DIY project lies in its remarkable versatility. A carefully arranged layout of dried ferns and delicate petals looks equally stunning in a rustic countryside cottage as it does in a highly curated, minimalist apartment. Let us dive into the precise steps needed to successfully extract moisture from your plants without losing their vibrant pigmentation.
The Best Plant Varieties for Pressing and Preserving
Not all botanicals respond well to the flattening process. Understanding the anatomy of your chosen specimens is the crucial first step to ensuring a successful project.
Ideal Thin-Petaled Candidates
The absolute easiest varieties to work with possess naturally flat faces and thin, single-layered petals. Pansies, violas, cosmos, and delicate daisies are fantastic for beginners. Because they hold very little intrinsic moisture, they dry rapidly, which significantly reduces the risk of mold formation.

Working with Leaves and Foliage
Do not limit yourself strictly to colorful blossoms. Lush greenery provides a breathtaking, architectural contrast in a frame. Small clippings from your Swiss Cheese Monstera, delicate maidenhair ferns, or even flat Peperomia leaves press beautifully. These vibrant green elements are essential if you are leaning towards a biophilic design aesthetic.
What to Avoid (or Dissect)
Thick, globe-like blooms such as heavy roses, peonies, or orchids contain massive amounts of water. If you attempt to squash them whole, they will simply rot or turn brown. To utilize these, you must gently pluck the individual petals and flatten them one by one, rather than attempting to preserve the entire flower head.
Trending Methods: How to Extract Moisture Quickly
Extracting water efficiently is the secret to retaining vibrant colors. If the drying process takes too long, the organic material oxidizes and turns a muddy brown.
Method A: The Traditional Heavy Book Technique
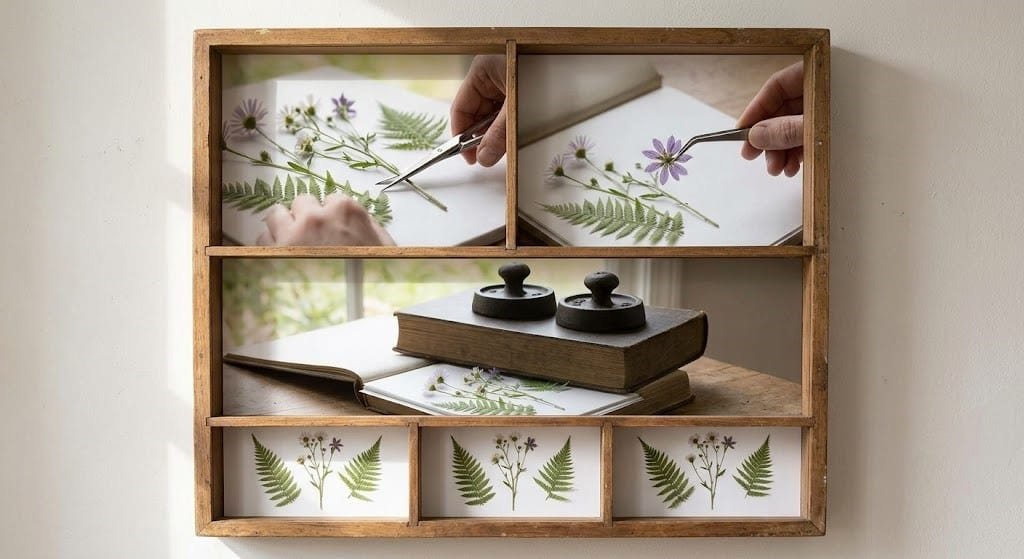
This is the classic, accessible route. Open a heavy dictionary or encyclopedia and line the pages with two sheets of absorbent parchment paper or high-quality blotting paper (never use wax paper, as it traps moisture). Arrange your specimens so they do not overlap, close the book, and stack several heavier weights on top. Leave them entirely undisturbed for three to four weeks.

Method B: The Microwave Pressing Hack (Fastest)
If you are impatient, modern technology can accelerate this process from weeks to minutes. You will need two unglazed ceramic tiles. Place your flora between two pieces of blotting paper, sandwich them firmly between the heavy ceramic tiles, and secure them with thick rubber bands. Microwave on low power in short, 30-second bursts, allowing the tiles to cool completely between each cycle until the plant matter is perfectly crisp.
Essential Supplies Needed for Framing Botanical Art
Once your flora is successfully dried and flattened, transitioning them to a permanent display requires specific, archival-quality materials.
The Double-Glass Float Frame
While standard frames with paper backings work fine, the “floating” frame is currently dominating interior design trends. These fixtures feature two parallel panes of glass that clamp together. When hung, the wall color shows through the transparent background, making the dried stems appear as if they are hovering in mid-air.

Acid-Free Adhesives and Tools
Dried petals are incredibly brittle. You must use fine-tipped metal tweezers to handle them, as the natural oils from your bare fingers can cause discoloration over time. Furthermore, if you need to secure a slipping stem, use only a tiny microscopic dot of acid-free botanical glue. Standard craft glues contain chemicals that will burn and yellow the organic material.
Step-by-Step Guide: Designing Your Layout
Arranging your dried collection is where your personal creativity takes center stage.
Cleaning the Glass Surface
Begin by thoroughly cleaning both interior sides of your glass panes with a streak-free solution and a microfiber cloth. Even a single lingering fingerprint or speck of dust will be highly visible once the piece is sealed and hung in a brightly lit room.

Drafting the Composition
Never glue anything down on your first attempt. Use a spare piece of plain white paper to map out your design. You can opt for a structured, symmetrical grid pattern for a modern look, or a wild, overlapping “scattered meadow” aesthetic for a more relaxed, bohemian vibe. Once you are thrilled with the arrangement, carefully recreate it onto the bottom pane of your glass.
Matching Botanical Art with Interior Decor Styles
The way you choose to display your finished piece should effortlessly harmonize with the existing architectural vibe of your home.
Japandi and Minimalist Spaces
For a Japandi interior layout, embrace negative space. Select a sleek, matte black or raw blonde-wood frame. Mount just one or two elegant, architectural stems (like a single dried fern frond) in the exact center. The simplicity of the layout commands attention without cluttering the visual field.

Modern Farmhouse Charm
If your home leans toward rustic warmth, opt for distressed, reclaimed wooden frames. You can arrange vibrant, colorful wildflowers against a textured, cream-colored linen backing board
instead of transparent glass. This adds incredible tactile warmth, perfect for hanging above a cozy custom window seat.

Crucial Preservation: How to Prevent Colors from Fading
The most common frustration with DIY botanical art is that the beautiful pinks and purples inevitably fade to a dull beige after a few months. While some natural fading is unstoppable, you can dramatically slow the process.
Mandatory UV Protection
Ultraviolet radiation is the ultimate enemy of preserved flora. The sun will rapidly bleach your artwork. To combat this, you must hang your finished piece on a shaded interior wall that never receives direct sunlight. For premium protection, upgrade your frame’s standard glass to UV-filtering acrylic or museum-grade conservation glass.

Managing Household Humidity
Moisture is the second biggest threat. If you hang your delicate artwork in a steamy bathroom or directly above a boiling kitchen stove, the dried leaves will reabsorb the ambient humidity, leading to rapid mold growth inside the sealed environment. Keep your creations in dry, climate-controlled living areas or bedrooms.
Professional Florist Insights
As a botanical preservation specialist, the most critical error I see beginners make is attempting to press flowers that are secretly damp. Never harvest your garden cuttings early in the morning when they are still coated in overnight dew, or immediately after a rainstorm. You must pick your subjects in the mid-afternoon when the sun has completely evaporated all surface moisture. Even a microscopic droplet of external water trapped between your pressing papers will cause rapid fungal rot, destroying the entire batch. Always ensure the petals feel completely dry to the human touch before you begin the flattening process.
Conclusion
Learning how to accurately press and frame flowers is a deeply rewarding, slow-living craft. By selecting the correct thin-petaled varieties, utilizing effective moisture-extraction methods, and arranging them elegantly within double-glass floating frames, you create customized, breathtaking decor. As long as you protect your finished masterpieces from harsh ultraviolet light and excessive household humidity, these stunning natural snapshots will continue to elevate your home’s aesthetic for many years to come.
FAQs
Do pressed flowers eventually lose their color?
Yes, all organic material will experience some degree of fading over time as a natural part of the aging process. However, you can significantly delay this color loss by ensuring they are 100% dry before framing and displaying them entirely out of direct sunlight using UV-protective glass.
Can I use a normal iron to press plants?
Yes, the ironing method works for quick results. Place the bloom between two sheets of parchment paper, ensure the steam setting on your iron is completely turned off, and press down firmly on a low heat setting for 10-15 seconds at a time until crisp.
Why did my pressed flowers turn brown and moldy?
Browning and mold are direct results of trapped moisture. This happens if the flowers were picked while wet, if they were too thick (like a full rose), or if you used an impermeable barrier like wax paper instead of breathable, moisture-absorbing blotting paper during the pressing phase.